Showing posts with label Garlands and Wreaths. Show all posts

Sunday, November 29, 2009

Design a Simple Christmas Wreath / Shelf Top Display


This is the display I created for the top of a timber bookcase in my dining/family room. It sits behind my dining room table where we will sit down to enjoy our Christmas dinner. The table will feature a green, silver, white and gold scheme and I wanted the displays in this room to tie in. The pewter picture frames which are displayed on the top shelf of this bookcase were left in place and I assembled the display around them. You do not need to take everything down in order to create a Christmas display, use your home's everyday decor, favourite possessions and family pictures to inspire your Christmas decorating!

For this shelf, I put together a simple wreath which was so easy to make, it took me just 5 minutes to assemble!
On to a small faux conifer base purchased at 'Spotlight' for around $6, I poked in some glittery, silver leaves which were pulled off a stem found at 'BIG W' for $4. (They also come in gold) I did not use any glue, the wreath will rest against the back of the shelf. If you wish to hang your wreath on a wall, you might consider using hot glue to secure the leaves. This is a temporary wreath. I will reuse the base and leaves next year to make something different!
A few wired faux red berries are poked in for contrast.


A little embellishment is needed for the top of the wreath. I considered using this silvery dove.

But in the end I opted for a glittery, silver icicle - it cost less than $5 at 'The Reject Shop'. I simply threaded its cord through and tied it in place on the underside of the wreath. You may already have suitable decorations in your Christmas tree decoration box which could be used to decorate your wreath - stars, angels, bells, baubles - whatever you so desire!

How about some butterflies instead of leaves? This set cost $4 at 'BIG W' . You could also use this wreath as the base for a table top wreath, placing a hurricane holder with a coordinating candle in the centre. I would not use the icicle in this case, just the leaves and berries.


With the wreath in place at the centre of the shelf. I am now able to decorate my shelf and create my special Christmas display - again this only took a few minutes. I used fresh greenery from my garden, sprigs of cedar, some of the faux lime green succulents and a few glittery mistletoe leaves - but you could use fresh of course. I had purchased a big bunch of these realistic looking succulents at a garage sale and I have used them on several of my Christmas wreaths. Cinnamon sticks add a rustic touch. Apples are perfect to use in a Christmas display - as are oranges, stud them with cloves if you want added scent.

I love to use candles at Christmas and I was thrilled to find the glass silver tealight holders at a discount store - the glittery snowflake embellishment mirrors the one at the top of the wreath and this is why I chose the icicle rather than the dove for the wreath. I used four tealights for this shelf top - use more if you have a longer cabinet or table top to decorate. When decorating with candles, especially tealights I always like to use more rather than less. The beauty of tea lights in holders is that you have less risk of candle wax dripping onto your display or the risk of setting one of your decorations alight when the candle is lit. Tea light candles are so cheap to purchase too!
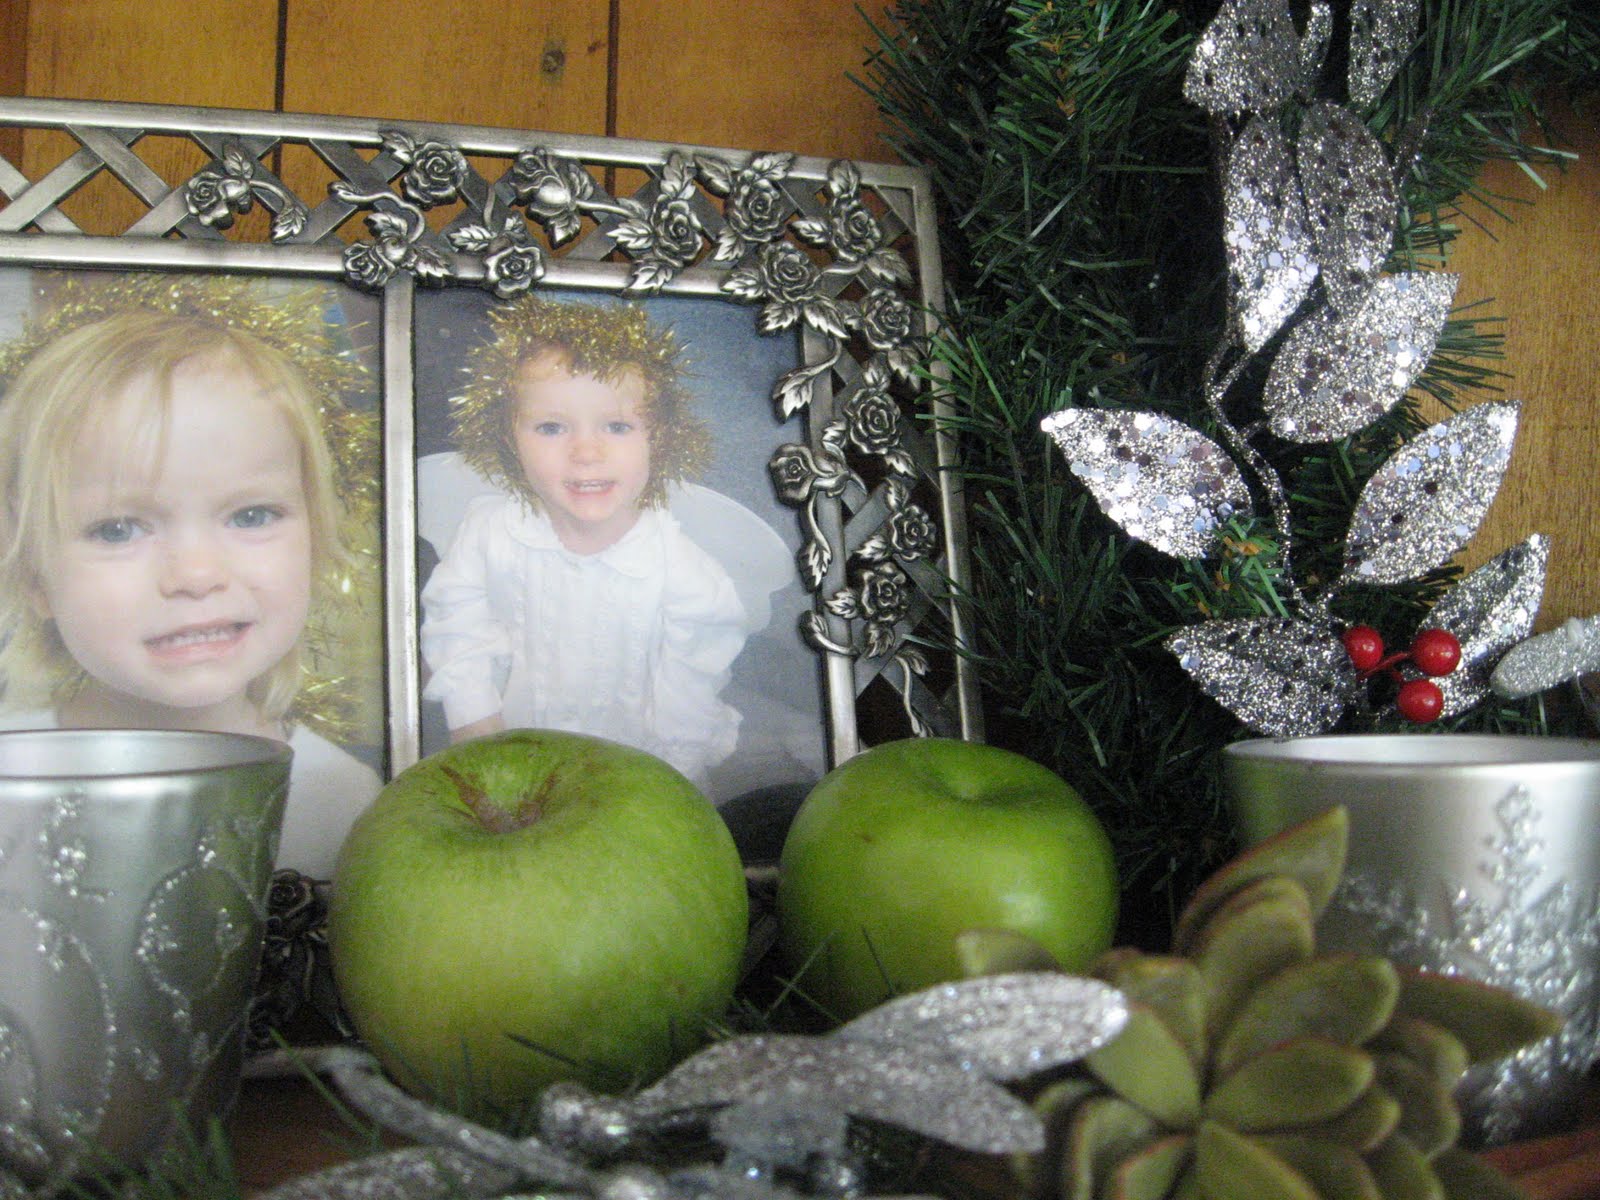

My 'little angels' - my twin girls are watching over this Christmas display. They celebrate their 4th birthday on the 1st December, their middle names are 'Joy' and 'Hope' - so appropriate for the season and a beautiful reminder of what Christmas and children are all about!


The finishing touch for this display is a glittery, silver decoration which rests at the base of the wreath, it describes perfectly what Christmas decorating brings me - JOY of course. Just remember - decorating your home for Christmas should bring you pleasure, it should not be a tedious task and sometimes keeping it simple, as I have with this wreath and display is the one of the best ways to ensure that it remains a joyous thing to do! In fact, this is one of my favourite displays in my home this season and it took just minutes to assemble.

Have fun and enjoy creating your own Christmas displays. I look forward to showing you some more corners of my Christmas home at Eden soon.

With Love and Joy,
Ann

Design and make a Traditional Christmas Wreath

In my last post I showed you how I constructed my modern Christmas wreath. I have also created a more traditional wreath for my formal living room - it is my 'Joy of Family' garland which features in my post on inspiration for wreaths. As I put it together, I took some shots to give you an idea of the process involved in making a more elaborate wreath.

It is assembled on a faux conifer wreath purchased from a craft store. The first step was to wind around a length of glittery Christmas tree beads around the garland. Small, green 'Granny Smith' apples are attached at regular intervals using the hot glue gun. I have also used limes, red apples and pomegranates - all faux. Fresh fruit would simply be too heavy for this wreath and rot very quickly in this hot, humid climate!

At the base of the wreath I glued on long cinnamon sticks, one large gold poinsettia and alongside it, more fruit and faux succulents. Green wired leaves are glued in behind the fruit and I also used a stem of faux berries in a mulberry shade. I always place on the larger features first, followed by the prominent design elements - which for this wreath is the set of tiny 'gold' picture frames which display black and white childhood photos of all the members of our family.


Here are some of the design details which were glued around one of the frames. A silver pine cone rose, gold and green ivy, tiny roses, a red cherry and a small ceramic teddy bear next to the frame which is to hold a picture of my baby due this Christmas season!


This wreath illustrates that you do not have to restrict your design to fruit and flowers, the Christmas tree decoration aisle at the department store may have sets of decorations which will give you an idea for a decorating theme which sets your wreath apart from the usual store bought wreaths which I have noticed this year are quite costly and have very few features apart from a few faux flowers, glittery pine cones and plastic berries.


Even if you do not have time this year to make a more elaborate wreath I hope that this post has offered some inspiration. From Boxing day onwards, all those wreath bases and Christmas tree decorations will go on sale and you may consider purchasing some to construct a wreath for next year. Gather dried natural materials in other seasons - pine cones, seed heads, sea shells, gum nuts and store them in readiness for next year.

If you would like a wreath to display this Christmas but have limited time in my next post, I will show you a 5 minute design idea for a 'bookshelf' wreath.

With Love and Joy,
Ann

Sunday, November 22, 2009

Design and make a Modern Christmas Wreath

The hot glue gun is plugged in. I am sitting at my dining room table surrounded by a variety of materials - silk and polyester leaves, flowers, cinnamon sticks, seashells, tiny pine cones and gum nuts, faux berries and stems of crystal beads. Bare twiggy garlands await embellishment. I have a design idea in my head and a colour scheme - pink roses teamed with mauve berries and silver leaves, a departure from the usual red, gold and green one associates with Christmas, it is a more modern interpretation of the festive garland. The finished wreath would look good in my girl's room or perhaps I should display it outside over the white garden bench which sits outside the front window of my home to welcome visitors who arrive at my home over the Christmas season. It may even look good on the door of my Indonesian cabinet. It will go where it looks best, not in the formal living room where my tree is located which has a more traditional atmosphere with the piano and rolled arm couches and is better suited to a more traditional decorating scheme. As a homemaker I do enjoy making these decorating decisions, especially at Christmas when I want my home to look extra special, when we will welcome others and extend gracious hospitality.

Please join me as I pick up the glue gun and learn how simple it is to create your own wreath to decorate your home!

The first step is to glue leaves onto the wreath base. The leaves I am using came from a long garland purchased from a discount store. I did not buy this to string over the top of a cabinet. I liked the variegated colours and different shades of the leaves which I ripped off and used as the background for building my design upon. They only need a dab of hot glue, overlapping them as I work around the perimeter, alternating the green leaves with the silvery, purple ones.

The other elements I have chosen to incorporate into my design are sitting in a little mound - I take different roses out of my 'flower box' - will I use cream or pink or both? I hold them up against the wreath and place them next to the other materials - I want to know whether the combination will be pleasing to the eye. I try different arrangements and when I am satisfied I start to attach the roses and cinnamon sticks which will be the main features of this wreath.


I have worked out what will feature on the top and base of the wreath and commenced my design. Dried moss and a pine cone are added in. I then start to build the design for the bottom of the wreath. Onto the moss I will glue an extra rose using the 'rule of threes' that many floral decorators use. Peeking out from under the roses are the smaller items that 'set the roses off' - green silk ivy leaves, tiny shells with pinkish tones, a star anise. Next I start to poke in the mauve twigs of berries which will partner the silvery leaves. These berries will work themselves up around the wreath, as if they were twining around a branch, a reflection of how climbing plants are seen in the natural setting. The berries are wired and I can place them into position and adjust them before I add a tiny dab of glue behind the berry to secure it.


I have also decided to use a few gold ivy leaves for contrast. They have silvery veins. If you do not have gold or silver leaves simply give plain green polyester leaves a sheen with gold or silver spray paint. Do not coat them completely with the paint - just a quick spray gives a very pleasing result. I have used silver paint on the leaf which peeks out from under the gold ivy.


I turn my attention to the top of the wreath. I have chosen a starfish to be the feature - this is a decorative element which works in well with the shells. A tiny wooden gold star is glued into its centre and self-adhesive silver letters spell out 'joy'. This is the finishing touch and is attached after I have added in the glittery silver leaves and ferns which add sparkle to this garland.


This is a close up the finished wreath. I have hung it from the door of my wooden cabinet to take this shot. If I was going to have the wreath on display here I would consider using silver sprays of leaves, silver pine cones and faux purple berries to surround purple glass candle holders to decorate the top of the cabinet. Can you imagine a table set with a white or silver tablecloth and sparkling purple glasses and matching napkins? As I have already decided upon a green, white and silver colour scheme for my table I will not be using this design - I just wanted to give you the idea if you are drawn to such colour schemes or perhaps your soft furnishings are berry shades. Choose Christmas decorations that work with, rather than against the overall scheme of your room.


If you want to add a little final flourish why not hang a decoration from the wreath? This sweet quirky little fairy (or is she an angel?) was a Christmas gift from my son, she is quite different from the other angels which are trimming the tree and I like to display her on her own. I thought her dress and bouquet complemented the wreath. A sheer purple ribbon is used to hang the wreath - on the inside of the door is a small hook, the wreath is attached here before closing the door.


For now, my modern wreath hangs outside over the white garden bench at the front entrance to my home. Its silvery green leaves complement the foliage of the cedar and cypress trees which frame the entrance. It is a smaller wreath and right now I am adding the finishing touches to a much bigger gold wreath which combines both modern and traditional design elements. I hope to have this completed soon and will show you the finished result. In the next post I will show you how I constructed my more traditional 'Joy of Family' garland and share some simple ideas for wreaths which will ensure you do not burn the ends of your fingers - the hazard of using a hot glue gun - ouch! But if you want to do some serious crafting and attach lots of heavier decorations this is a tool you cannot go without! Just a couple of tips, buy a heavier duty one from the hardware store and hide it from the man in your life or it may disappear into the recesses of his garage or workshop, never to be seen again - I must buy my husband his own glue gun sometime!

With Love and Joy,
Ann

Sunday, November 15, 2009

Creative Christmas Wreaths - Inspiration

I have been making Christmas wreaths and garlands for many years, it is simply something I love to do - to decorate my home with boughs of greenery embellished with glittery leaves, ferns, flowers and berries to welcome friends but I want more than just a wreath hung on the front door which is only glimpsed as people enter. I like to have wreaths in different rooms and so each year I create not one but several wreaths for Christmas. Some are elaborate, a little flamboyant, even quirky, others are simple and adorned with only a few select items. I love them all because I created them!


I would love to show you the wreaths I have created for this Christmas season - to inspire you perhaps, not to race out to the store to purchase a pre-decorated wreath but to create one for yourself. A more personal expression than something which was mass produced in a factory. I will show you in my next post how to create a more elaborate wreath, then I have a 5 minute wreath idea for those of you who do not have the time or do not yet own a hot glue gun!


I should explain why I choose to use mainly faux greenery, flowers and berries. I used to make natural wreaths from vines, fresh leaves and berries but having come to live in a hot, humid climate I find the 'all natural' decorations do not last very long - in just a few days, the greenery starts to wilt. It also means I cannot create displays in advance - I still decorate my home with fresh greenery but I use it mainly to decorate the tops of shelves, to set around the bases of candles which will sit on coffee tables - these are my last minute displays which are created in the days before Christmas. I hope to be able to show you how I use the abundant greenery to decorate my home which I am blessed to have just outside my door from the forest garden at 'Eight Acres of Eden'.


To show you just what materials can be incorporated into a wreath, I would like to take you on a 'tour of a garland' - my traditional Christmas wreath which I have created for my formal sitting room. This is where my tree is located - yes, it is up and decorated in a traditional colour scheme of red, green and gold. This wreath is designed to co ordinate and it has a theme - the 'Joy of Family'.

It features silk leaves, faux fruit and berries, glittery tree decorations and tiny gold picture frames which display black and white childhood photos of each member of our family. The little girl in the jaunty hat and coat is me and the cute boy is my husband!


I have used hot glue to attach all the decorations - I always start with the leaves and larger decorative items, alternating colours. Smaller embellishments such as berries and tiny ferns are added in later. I glued on the family photos in order of birth. My oldest son is first, followed by his sister - close to her picture is a tiny starfish - a reminder of her love of the beach. The photo I selected to copy for the frame was taken at a beautiful beach close to where we lived in New Zealand.


As we travel down the garland we meet my third born, my daughter who has a vibrant, mischievous personality! The single, gold poinsettia is the largest item on the wreath. I like to place the larger decorative elements at the bottom of my wall hung wreaths.

Alongside are the other floral and nature inspired features - silk leaves, pine cones, long cinnamon sticks, faux fruit and sprigs of berries. I love to use dried, natural materials and combine them with the faux items. The green succulents are not real - they are also flexible and can be arranged into the shape you desire - wonderful when you are working around other materials. I found these at a garage sale! The faux berries were purchased at a market stall and the fruit was 'recycled' - detached from wreaths and garlands made in previous seasons. You cannot do this with fresh fruit! The little boy on this section is my first Christmas baby - he was born at home in the week before Christmas ten years ago and delivered by his father when the midwife did not arrive on time. It was one of my most memorable birth experiences - I decorated my tree during labour, hanging ornaments in between contractions! This explains why I have decorated my tree early this year, my next baby is due the week before Christmas!


My adorable twin girls have a close attachment, therefore I placed their pictures alongside each other in matching heart shaped frames. I love these ceramic rocking horse ornaments and thought they deserved a place on this wreath. My twins were also due the week before Christmas four years ago, they arrived two weeks early at the start of Advent on the first day of December - a very special early Christmas gift from God who knows how much I love Christmas that he chooses to bless me with babies at this special time of the year! In the month of December I will also celebrate my 20Th wedding anniversary! I am the girl who chose to get married at Christmas - my bridesmaids wore burgundy satin dresses and I had real holly and ivy in my bouquet surrounding white roses! I will post a picture at my family blog closer to the date. The final frame on my family garland is blank - it awaits a picture of my baby yet to be born - my gift from Heaven, number seven!

I hope you have enjoyed the tour of my garland and that it has given you some inspiration for what can be used to embellish a wreath. I found many of my decorations in the Christmas aisles at discount stores - they were not expensive. This season there are lots of unusual tree decorations in the stores and lots of glitter and sparkle for those who love their bling! Why opt for tinsel and plastic santas when you can have butterflies, snowflakes, tiaras, handbags and shoes!


In my next post I will show you in closer detail how I constructed both the 'Joy of Family' garland and the lilac and silver wreath which features as my link button to 'Christmas at Eden' from my main blog.

With Love and Joy,
Ann