Sunday, November 29, 2009

Design a Simple Christmas Wreath / Shelf Top Display


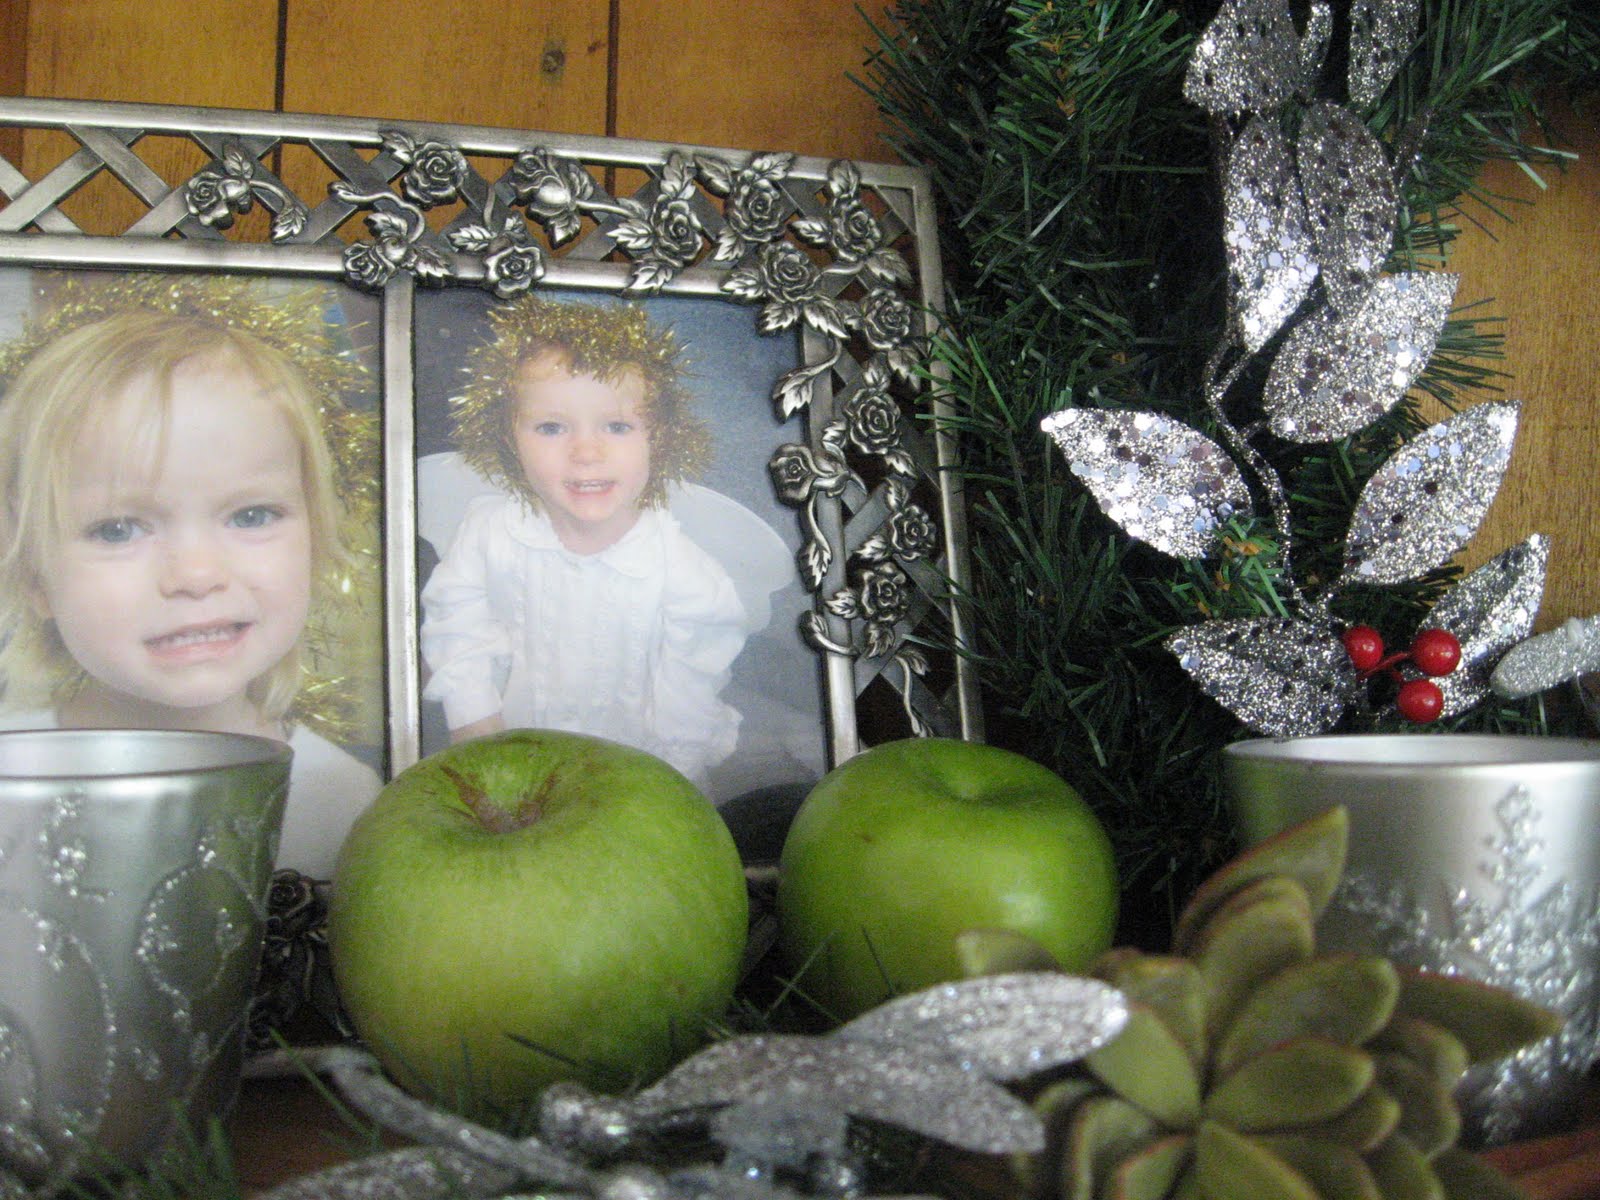
This is the display I created for the top of a timber bookcase in my dining/family room. It sits behind my dining room table where we will sit down to enjoy our Christmas dinner. The table will feature a green, silver, white and gold scheme and I wanted the displays in this room to tie in. The pewter picture frames which are displayed on the top shelf of this bookcase were left in place and I assembled the display around them. You do not need to take everything down in order to create a Christmas display, use your home's everyday decor, favourite possessions and family pictures to inspire your Christmas decorating!

For this shelf, I put together a simple wreath which was so easy to make, it took me just 5 minutes to assemble!
On to a small faux conifer base purchased at 'Spotlight' for around $6, I poked in some glittery, silver leaves which were pulled off a stem found at 'BIG W' for $4. (They also come in gold) I did not use any glue, the wreath will rest against the back of the shelf. If you wish to hang your wreath on a wall, you might consider using hot glue to secure the leaves. This is a temporary wreath. I will reuse the base and leaves next year to make something different!
A few wired faux red berries are poked in for contrast.


A little embellishment is needed for the top of the wreath. I considered using this silvery dove.

But in the end I opted for a glittery, silver icicle - it cost less than $5 at 'The Reject Shop'. I simply threaded its cord through and tied it in place on the underside of the wreath. You may already have suitable decorations in your Christmas tree decoration box which could be used to decorate your wreath - stars, angels, bells, baubles - whatever you so desire!

How about some butterflies instead of leaves? This set cost $4 at 'BIG W' . You could also use this wreath as the base for a table top wreath, placing a hurricane holder with a coordinating candle in the centre. I would not use the icicle in this case, just the leaves and berries.


With the wreath in place at the centre of the shelf. I am now able to decorate my shelf and create my special Christmas display - again this only took a few minutes. I used fresh greenery from my garden, sprigs of cedar, some of the faux lime green succulents and a few glittery mistletoe leaves - but you could use fresh of course. I had purchased a big bunch of these realistic looking succulents at a garage sale and I have used them on several of my Christmas wreaths. Cinnamon sticks add a rustic touch. Apples are perfect to use in a Christmas display - as are oranges, stud them with cloves if you want added scent.

I love to use candles at Christmas and I was thrilled to find the glass silver tealight holders at a discount store - the glittery snowflake embellishment mirrors the one at the top of the wreath and this is why I chose the icicle rather than the dove for the wreath. I used four tealights for this shelf top - use more if you have a longer cabinet or table top to decorate. When decorating with candles, especially tealights I always like to use more rather than less. The beauty of tea lights in holders is that you have less risk of candle wax dripping onto your display or the risk of setting one of your decorations alight when the candle is lit. Tea light candles are so cheap to purchase too!


My 'little angels' - my twin girls are watching over this Christmas display. They celebrate their 4th birthday on the 1st December, their middle names are 'Joy' and 'Hope' - so appropriate for the season and a beautiful reminder of what Christmas and children are all about!


The finishing touch for this display is a glittery, silver decoration which rests at the base of the wreath, it describes perfectly what Christmas decorating brings me - JOY of course. Just remember - decorating your home for Christmas should bring you pleasure, it should not be a tedious task and sometimes keeping it simple, as I have with this wreath and display is the one of the best ways to ensure that it remains a joyous thing to do! In fact, this is one of my favourite displays in my home this season and it took just minutes to assemble.

Have fun and enjoy creating your own Christmas displays. I look forward to showing you some more corners of my Christmas home at Eden soon.

With Love and Joy,
Ann

Design and make a Traditional Christmas Wreath

In my last post I showed you how I constructed my modern Christmas wreath. I have also created a more traditional wreath for my formal living room - it is my 'Joy of Family' garland which features in my post on inspiration for wreaths. As I put it together, I took some shots to give you an idea of the process involved in making a more elaborate wreath.

It is assembled on a faux conifer wreath purchased from a craft store. The first step was to wind around a length of glittery Christmas tree beads around the garland. Small, green 'Granny Smith' apples are attached at regular intervals using the hot glue gun. I have also used limes, red apples and pomegranates - all faux. Fresh fruit would simply be too heavy for this wreath and rot very quickly in this hot, humid climate!

At the base of the wreath I glued on long cinnamon sticks, one large gold poinsettia and alongside it, more fruit and faux succulents. Green wired leaves are glued in behind the fruit and I also used a stem of faux berries in a mulberry shade. I always place on the larger features first, followed by the prominent design elements - which for this wreath is the set of tiny 'gold' picture frames which display black and white childhood photos of all the members of our family.


Here are some of the design details which were glued around one of the frames. A silver pine cone rose, gold and green ivy, tiny roses, a red cherry and a small ceramic teddy bear next to the frame which is to hold a picture of my baby due this Christmas season!


This wreath illustrates that you do not have to restrict your design to fruit and flowers, the Christmas tree decoration aisle at the department store may have sets of decorations which will give you an idea for a decorating theme which sets your wreath apart from the usual store bought wreaths which I have noticed this year are quite costly and have very few features apart from a few faux flowers, glittery pine cones and plastic berries.


Even if you do not have time this year to make a more elaborate wreath I hope that this post has offered some inspiration. From Boxing day onwards, all those wreath bases and Christmas tree decorations will go on sale and you may consider purchasing some to construct a wreath for next year. Gather dried natural materials in other seasons - pine cones, seed heads, sea shells, gum nuts and store them in readiness for next year.

If you would like a wreath to display this Christmas but have limited time in my next post, I will show you a 5 minute design idea for a 'bookshelf' wreath.

With Love and Joy,
Ann

Sunday, November 22, 2009

Design and make a Modern Christmas Wreath

The hot glue gun is plugged in. I am sitting at my dining room table surrounded by a variety of materials - silk and polyester leaves, flowers, cinnamon sticks, seashells, tiny pine cones and gum nuts, faux berries and stems of crystal beads. Bare twiggy garlands await embellishment. I have a design idea in my head and a colour scheme - pink roses teamed with mauve berries and silver leaves, a departure from the usual red, gold and green one associates with Christmas, it is a more modern interpretation of the festive garland. The finished wreath would look good in my girl's room or perhaps I should display it outside over the white garden bench which sits outside the front window of my home to welcome visitors who arrive at my home over the Christmas season. It may even look good on the door of my Indonesian cabinet. It will go where it looks best, not in the formal living room where my tree is located which has a more traditional atmosphere with the piano and rolled arm couches and is better suited to a more traditional decorating scheme. As a homemaker I do enjoy making these decorating decisions, especially at Christmas when I want my home to look extra special, when we will welcome others and extend gracious hospitality.

Please join me as I pick up the glue gun and learn how simple it is to create your own wreath to decorate your home!

The first step is to glue leaves onto the wreath base. The leaves I am using came from a long garland purchased from a discount store. I did not buy this to string over the top of a cabinet. I liked the variegated colours and different shades of the leaves which I ripped off and used as the background for building my design upon. They only need a dab of hot glue, overlapping them as I work around the perimeter, alternating the green leaves with the silvery, purple ones.

The other elements I have chosen to incorporate into my design are sitting in a little mound - I take different roses out of my 'flower box' - will I use cream or pink or both? I hold them up against the wreath and place them next to the other materials - I want to know whether the combination will be pleasing to the eye. I try different arrangements and when I am satisfied I start to attach the roses and cinnamon sticks which will be the main features of this wreath.


I have worked out what will feature on the top and base of the wreath and commenced my design. Dried moss and a pine cone are added in. I then start to build the design for the bottom of the wreath. Onto the moss I will glue an extra rose using the 'rule of threes' that many floral decorators use. Peeking out from under the roses are the smaller items that 'set the roses off' - green silk ivy leaves, tiny shells with pinkish tones, a star anise. Next I start to poke in the mauve twigs of berries which will partner the silvery leaves. These berries will work themselves up around the wreath, as if they were twining around a branch, a reflection of how climbing plants are seen in the natural setting. The berries are wired and I can place them into position and adjust them before I add a tiny dab of glue behind the berry to secure it.


I have also decided to use a few gold ivy leaves for contrast. They have silvery veins. If you do not have gold or silver leaves simply give plain green polyester leaves a sheen with gold or silver spray paint. Do not coat them completely with the paint - just a quick spray gives a very pleasing result. I have used silver paint on the leaf which peeks out from under the gold ivy.


I turn my attention to the top of the wreath. I have chosen a starfish to be the feature - this is a decorative element which works in well with the shells. A tiny wooden gold star is glued into its centre and self-adhesive silver letters spell out 'joy'. This is the finishing touch and is attached after I have added in the glittery silver leaves and ferns which add sparkle to this garland.


This is a close up the finished wreath. I have hung it from the door of my wooden cabinet to take this shot. If I was going to have the wreath on display here I would consider using silver sprays of leaves, silver pine cones and faux purple berries to surround purple glass candle holders to decorate the top of the cabinet. Can you imagine a table set with a white or silver tablecloth and sparkling purple glasses and matching napkins? As I have already decided upon a green, white and silver colour scheme for my table I will not be using this design - I just wanted to give you the idea if you are drawn to such colour schemes or perhaps your soft furnishings are berry shades. Choose Christmas decorations that work with, rather than against the overall scheme of your room.


If you want to add a little final flourish why not hang a decoration from the wreath? This sweet quirky little fairy (or is she an angel?) was a Christmas gift from my son, she is quite different from the other angels which are trimming the tree and I like to display her on her own. I thought her dress and bouquet complemented the wreath. A sheer purple ribbon is used to hang the wreath - on the inside of the door is a small hook, the wreath is attached here before closing the door.


For now, my modern wreath hangs outside over the white garden bench at the front entrance to my home. Its silvery green leaves complement the foliage of the cedar and cypress trees which frame the entrance. It is a smaller wreath and right now I am adding the finishing touches to a much bigger gold wreath which combines both modern and traditional design elements. I hope to have this completed soon and will show you the finished result. In the next post I will show you how I constructed my more traditional 'Joy of Family' garland and share some simple ideas for wreaths which will ensure you do not burn the ends of your fingers - the hazard of using a hot glue gun - ouch! But if you want to do some serious crafting and attach lots of heavier decorations this is a tool you cannot go without! Just a couple of tips, buy a heavier duty one from the hardware store and hide it from the man in your life or it may disappear into the recesses of his garage or workshop, never to be seen again - I must buy my husband his own glue gun sometime!

With Love and Joy,
Ann

Sunday, November 15, 2009

Creative Christmas Wreaths - Inspiration

I have been making Christmas wreaths and garlands for many years, it is simply something I love to do - to decorate my home with boughs of greenery embellished with glittery leaves, ferns, flowers and berries to welcome friends but I want more than just a wreath hung on the front door which is only glimpsed as people enter. I like to have wreaths in different rooms and so each year I create not one but several wreaths for Christmas. Some are elaborate, a little flamboyant, even quirky, others are simple and adorned with only a few select items. I love them all because I created them!


I would love to show you the wreaths I have created for this Christmas season - to inspire you perhaps, not to race out to the store to purchase a pre-decorated wreath but to create one for yourself. A more personal expression than something which was mass produced in a factory. I will show you in my next post how to create a more elaborate wreath, then I have a 5 minute wreath idea for those of you who do not have the time or do not yet own a hot glue gun!


I should explain why I choose to use mainly faux greenery, flowers and berries. I used to make natural wreaths from vines, fresh leaves and berries but having come to live in a hot, humid climate I find the 'all natural' decorations do not last very long - in just a few days, the greenery starts to wilt. It also means I cannot create displays in advance - I still decorate my home with fresh greenery but I use it mainly to decorate the tops of shelves, to set around the bases of candles which will sit on coffee tables - these are my last minute displays which are created in the days before Christmas. I hope to be able to show you how I use the abundant greenery to decorate my home which I am blessed to have just outside my door from the forest garden at 'Eight Acres of Eden'.


To show you just what materials can be incorporated into a wreath, I would like to take you on a 'tour of a garland' - my traditional Christmas wreath which I have created for my formal sitting room. This is where my tree is located - yes, it is up and decorated in a traditional colour scheme of red, green and gold. This wreath is designed to co ordinate and it has a theme - the 'Joy of Family'.

It features silk leaves, faux fruit and berries, glittery tree decorations and tiny gold picture frames which display black and white childhood photos of each member of our family. The little girl in the jaunty hat and coat is me and the cute boy is my husband!


I have used hot glue to attach all the decorations - I always start with the leaves and larger decorative items, alternating colours. Smaller embellishments such as berries and tiny ferns are added in later. I glued on the family photos in order of birth. My oldest son is first, followed by his sister - close to her picture is a tiny starfish - a reminder of her love of the beach. The photo I selected to copy for the frame was taken at a beautiful beach close to where we lived in New Zealand.


As we travel down the garland we meet my third born, my daughter who has a vibrant, mischievous personality! The single, gold poinsettia is the largest item on the wreath. I like to place the larger decorative elements at the bottom of my wall hung wreaths.

Alongside are the other floral and nature inspired features - silk leaves, pine cones, long cinnamon sticks, faux fruit and sprigs of berries. I love to use dried, natural materials and combine them with the faux items. The green succulents are not real - they are also flexible and can be arranged into the shape you desire - wonderful when you are working around other materials. I found these at a garage sale! The faux berries were purchased at a market stall and the fruit was 'recycled' - detached from wreaths and garlands made in previous seasons. You cannot do this with fresh fruit! The little boy on this section is my first Christmas baby - he was born at home in the week before Christmas ten years ago and delivered by his father when the midwife did not arrive on time. It was one of my most memorable birth experiences - I decorated my tree during labour, hanging ornaments in between contractions! This explains why I have decorated my tree early this year, my next baby is due the week before Christmas!


My adorable twin girls have a close attachment, therefore I placed their pictures alongside each other in matching heart shaped frames. I love these ceramic rocking horse ornaments and thought they deserved a place on this wreath. My twins were also due the week before Christmas four years ago, they arrived two weeks early at the start of Advent on the first day of December - a very special early Christmas gift from God who knows how much I love Christmas that he chooses to bless me with babies at this special time of the year! In the month of December I will also celebrate my 20Th wedding anniversary! I am the girl who chose to get married at Christmas - my bridesmaids wore burgundy satin dresses and I had real holly and ivy in my bouquet surrounding white roses! I will post a picture at my family blog closer to the date. The final frame on my family garland is blank - it awaits a picture of my baby yet to be born - my gift from Heaven, number seven!

I hope you have enjoyed the tour of my garland and that it has given you some inspiration for what can be used to embellish a wreath. I found many of my decorations in the Christmas aisles at discount stores - they were not expensive. This season there are lots of unusual tree decorations in the stores and lots of glitter and sparkle for those who love their bling! Why opt for tinsel and plastic santas when you can have butterflies, snowflakes, tiaras, handbags and shoes!


In my next post I will show you in closer detail how I constructed both the 'Joy of Family' garland and the lilac and silver wreath which features as my link button to 'Christmas at Eden' from my main blog.

With Love and Joy,
Ann

Sunday, November 8, 2009

'Across the Miles' Gifts to Send Overseas

Do you have family and/or friends that live inter-state or in another country? Do you face the same dilemma as me each Christmas? Choosing gifts that are suitable to mail and posting them on time, so that your loved ones receive their gift in time for Christmas? I must confess that in some years, I have missed the deadline for posting parcels and my family in England have received their presents in January.

This year, I am prepared! I have found some lovely gifts for my mum and my sister's family and they are all wrapped and ready to mail. I have checked the Australia Post website
www.australiapost.com.au for last posting dates for International Air Mail but this information does not appear to be on their website yet. Last shipping dates are there (for sending parcels by sea post) but if you are considering this option - you have missed the boat! Check your country's mail service website for updates and information on mailing costs according to weight and standard card sizes - those small square cards may cost you more! Also very useful is the list of restrictions on what can be sent through the mail to other countries - I'd avoid sending those herbal eye pillows and the home made pot pourri and beeswax candles if I were you! Lots of food items appear on the restricted list. Wrapped commercial confectionery may reach its intended recipient but those delicious dried fruits you packaged up beautifully and the rose petal tea from your very own garden could be confiscated! Australia and New Zealand have very strict quarantine laws, especially when it comes to food and plant material, so warn your relatives who are sending gifts to you!

I hope to have my parcels posted before the end of November and this is why:-
1. I am expecting my baby in December
2. I do not intend to spend time waiting in the queues at the Post Office.
3. I want my family to receive their gifts by Christmas
4. There has been an ongoing postal strike in recent months in the UK which has created huge back logs of mail - If you are visiting here from the UK and can let me know whether this has been resolved yet and whether there is a likelihood of further strikes before Christmas, I would be very appreciative.
5. I wanted to share with you some gift ideas for gifts to send overseas, by showing you what I have found for my family this year! My budget for my sister's family was $50 (2 adults, 2 children) plus postage. Four quality gifts plus wrapping came in under budget at $45. I expect the postage to cost at least $25.
P.S I don't believe my sister reads my blog, otherwise, I would not be writing this post! If you are reading this sis - please leave me a comment! I hope you like your gifts!

I found lovely linen at a local gift shop. Linen is just perfect for sending overseas - lightweight, non-breakable and I was thrilled to find some lovely natural fabrics and feminine designs. A cotton apron bedecked in roses with a frilled hem and crocheted trim with for my mum who I know will appreciate a practical gift - this is something she will wear on many occasions and I know it will fit! I just love the fact that aprons are fashionable again and they are everywhere this season, there are so may designs to choose from and of course if you have a material stash and can sew, you can make them yourself - there are tons of patterns on the Internet. I chose to purchase aprons because I am extra busy with other crafts, I would have needed to travel to the fabric store in the city and the cost of the fabric plus the fuel would have been more than what I actually paid for the apron.


Aprons are a suitable gift for all ages - I sent one to my sister for her birthday last year and I could not resist purchasing one for myself in the same rose design. They also make good gifts for children, especially if you want to encourage their culinary skills. One lovely idea for a personalized gift is to make or purchase a plain apron and have it embroidered with the individual 's name - I purchased inexpensive black cotton aprons one year for my family and had our names professionally machine embroidered in silver thread at a cost of $5 per name. This was for a special occasion - my husband's 40Th Birthday which we celebrated with an 'All Black' Dinner Party - the 'All Blacks' of course are his country's Rugby Union Team. It made for a memorable dinner party as we served our guests a taste of New Zealand and our aprons have received ongoing use and are also a lovely reminder of a special family celebration. The black tablecloth I purchased for this occasion has also been used on many occasions - more to come on table cloths and colour schemes in a future post on setting the Christmas Table!


For less than $20, a personalized apron makes a wonderful gift for a friend who likes to cook. Fold it and wrap it in clear cellophane with the name showing, tie on some ribbon and maybe trim with a Christmas cookie cutter or special tag.


My sister is receiving a lovely Lingerie bag - this one is by Mozi, an Australian company which has beautiful linen in unusual designs. If your friend or relative likes cats then this design would surely appeal. I think it is gorgeous! Mozi also have tea towels in snazzy designs which are flat packed in card - perfect for mailing overseas. Look out for them in good linen shops and gift stores.

When you have sent enough koalas and kangaroos!

My sister has two young children and I do like to send them gifts from a 'Land Down Under'. I must say they have received their fair share of Australian animals on baby bibs, t shirts, and in colouring books - most people know we have kangaroos and koalas, so why not introduce your grandchildren, nephews and nieces living overseas to some more unusual native wildlife.

This furry guy is an echidna, he actually has spikes rather than fur and we have met one here at eight acres of eden up close and personal when we encountered him burrowing close to our garden shed. The echidna is not going to my nephews, they are growing up now but I could not resist putting him in the picture. I found him at the Australian Geographic store which has lots of children's toys including the more unusual creatures which inhabit this continent. My son wanted to pop into his grandmother's parcel, a tad oversize but very realistic looking, plastic red back spider. I advised him against it! She is petrified of spiders! You can visit Australian Geographic online if there is not a store near you www.australiangeographic.com.au

As I am trying to avoid plastic toys, I was looking out for wooden toys and found some at my local Post Office shop - a set of wooden pencils in a box which features a goanna as well as a kangaroo and a chunky wooden shark puzzle. The puzzle is by 'Wild Republic' which is an American company that does donate a portion of the sale of the product to a charitable foundation that provides housing, education and support to projects in impoverished countries.
Sadly, most of the 'Australian' gifts are made in China - even the ones from the Australian Geographic store.

I did however find beautiful cards, tags and gift wrap featuring Australian flora and fauna that is designed and made in Australia.


They are from 'earth greetings' and are printed carbon neutral in Australia on 100% post-consumer recycled paper with vegetable ink. The cards come in a pack of 10 and proceeds from sales go to 'Trees for Life' to plant 1 tree for every pack sold. It was the cockatoo design which caught my eye, so I bought one sheet to wrap my overseas gifts for family. The paper is very sturdy and most suitable for wrapping gifts that will have to travel through mail centres. Ever received gifts which were wrapped in thin budget wrap which was ripped to shreds by the time it arrived at its destination? At $3.75 a sheet I could not afford to wrap all my gifts in this paper, so I reused the brown paper bag my other gifts came in, to wrap the remaining presents.
These very special cards will be sent to family members overseas, especially older relatives who do not have computers who cannot receive emailed newsletters. The cards work out at just over $1 per card and the gift tags 50 cents each.


I found my earth greetings cards at my local wholefoods store and most of my gifts were purchased in my local town. 'Earth Greetings' have a website if you also like these designs and are searching for more Eco-friendly cards this year. Type the URL www.earthgreetings.com.au into your address bar, as I cannot get this link to work on blogger for some reason.

Other gifts I have sent in previous years to my family, include jewelry, clothing, books, Cd's and DVDS. If sending music Cd's I like to send music by Australian or Kiwi artists that they may not have heard of before. I have also sent a DVD to family that was produced locally for promotion of tourism - it features the stunning scenery of my local region and its attractions. It is presented by a well known national identity who lives locally. At a cost of $5 and packaged in a card envelope rather than a bulky plastic case, it is ideal for sending to friends and family overseas to show them the beautiful place which I am blessed to call my home. Check out your own local tourism centre to see if they have produced DVDs which promote the region where you live.

Also check the zoning for different countries on DVDs. It might not play in their DVD player. I was delighted to find that a movie about the life of Mother Theresa had universal zoning and this was a film my sister and her family really enjoyed watching. Just remember when it comes to movies and music - Have they seen it? It may pay to check and don't forget some of our Aussie characters are hugely popular overseas - your grandchildren may already own a collection of Wiggles DVDS!


I am sending my brother-in-law a book of devotions for Christian husbands and fathers. I know he will appreciate this but regarding books, even paperbacks can be heavy to send. I have weighed my gifts this year, so I have an indication of what I will be paying in postage. This is when you may wish to use online shopping. I have ordered gifts online and sent them from reputable online stores and well known chains. I do this for heavier items, breakables, flowers, electronics, books and last minute gifts - I sent my mum a fragile gift that I did not want to risk mailing, from one of my favourite English stores 'Past Times'. I love this shop! Check out their website www.pasttimes.com for beautiful, unusual and nostalgic reproduction gifts which reflect 'days gone by'. You will find gifts for home, garden, children and men. I love their Victorian inspired jewelry and nightwear. I have just had a quick skim of their website and there are some fabulous items, the 'Dig for Victory' mugs caught my eye and the 'Senior Moments' gifts if you are looking for a gift for the in-laws! Would I dare to send my mother-in-law the 'Lady of the Manor' cushion - I don't think so but you might be braver than me!

And to finish, a true but funny story about a gift I sent to my nephews some years ago, which arrived at the most appropriate moment. My sister used to live in a typical British 'two up two down' terraced house; one morning some friends arrived on the doorstep to visit but her husband was still in bed. He was obviously in a deep sleep and was not waking up despite them all calling his name in unison up the stairs. At that very moment the postman arrived with a parcel from overseas - my gifts to her family. She gave in to her son's pleas and allowed him to open up the gift addressed to him. He excitedly ripped off the paper and showed his mum what Auntie Ann had sent him - my sister and her friends burst into fits of uncontrollable laughter when they saw the gift. It was a Wiggles Video entitled 'Wake up Jeff' - my sister's sleeping husband was indeed called 'Geoff' and what had they been calling up the stairs to him but 'Wake Up Geoff'! I would have liked to think that my family place their beautifully wrapped gifts under the tree to open on Christmas day but on this occasion it was revealed at just the perfect moment!

More gift ideas to follow in upcoming posts but if you have to send gifts through the mail this Christmas this post is for you ! Avoid the queues, the crowds and the stress of last minute shopping!

With love and joy,
Ann

Wednesday, October 28, 2009

Handmade Christmas Crackers

For as long as I can remember, crackers or bon bons have always been a feature of the Christmas table. As a child, it was the part of the family dinner on Christmas day that I looked forward to the most - pulling the cracker and hearing it go snap and then seeing who received the end with the surprise, joke and paper hat. Of course the plastic toy inside was always a disappointment and the jokes were lousy! Nothing much has changed. You can of course purchase 'upmarket' Christmas crackers from department stores but these are fairly expensive and even the better quality 'middle of the road' crackers have contents that compare with the budget crackers - you are paying for the packaging!

Have you ever considered making your own? I started making my own crackers over 18 years ago. It became my personal Christmas tradition - I would make them as my contribution for the Christmas table if we were spending Christmas day at a relatives home and when we started to celebrate Christmas at home with our children, every person seated at the table received a personal cracker. I always make a few extra for unexpected guests. One year my husband invited a single father and his four children to join us for Christmas dinner - on Christmas morning! That was the year I had made a bumper load of crackers and it was so lovely to be able to give each of his children a cracker to pull. I also make crackers as gifts for friends and neighbours - filling them with with sweet treats - so much more personal than a box of chocolates!

The beauty of making your own crackers is that you get to choose what goes inside! It is fun to shop for cracker gifts - they have to fit inside the tube of course but you can personalize the gift for the recipient - earrings for a daughter, a mini-torch for a son, it is entirely up to you!


These are the crackers I have made for this Christmas. I usually choose a different theme for each year. This year I have made several sets as I want to give you some more unusual ideas for making your own - yes, I am going to show you how - step by step. First of all I want to offer you some design inspiration by showing you the different crackers I have made for Christmas 2009.


These crackers in a green, white, silver and gold palette are for my Christmas table. Our home is surrounded by greenery at Eight Acres of Eden. When we sit down to dinner we look out through full length glass doors to a forest setting. Boughs of cedar frame our home and eucalyptus trees and palms fill the canvas. I take my inspiration for decorating my home's interior from outside and therefore, green is the accent colour for my table setting - I have green glasses, I sometimes use green napkins and it teams beautifully with white which is why I often make my crackers in white with accents of green, silver and gold. I also match them to my other hand crafted items - the crackers coordinate with my table wreath which surrounds a hurricane lamp which holds the candle. I have added the same green and silver trim to a napkin ring.

This is such a wonderful way to plan your Christmas decorating. Choose colours that work with your home - do you have dark timber and red velvet cushions? Perhaps a more traditional scheme of red, green and gold will suit or is your home modern - maybe you live in a beach house, you could opt for white, ecru and coastal blue and use shells to accessorize instead of flowers. If you live in a log cabin, cottage or mud brick home, a more rustic decorating scheme may appeal.


These are my flower fairy crackers. I was inspired to make these when one of my daughter's Flower Fairy books fell apart at the binding. She decided to cut out all the illustrations to use for crafts and scrap booking. There were so many to choose from, including the Christmas fairies. I love the Snowdrop fairy though! What characters do your children like? - perhaps you could make Winnie the Pooh crackers! The whimsical angel earrings that appear in the stores are also perfect for trimming a little girl's cracker. Why not 'Superhero' crackers for a young boy?

'Childhood' or 'Victoriana' is a theme you could use for adults too. Victorian scrapbook embellishments can be found in many craft stores. Before you race out to the store, check your stash of old birthday and Christmas cards - if you don't drop them in the card recycling bins - I always keep my favourite cards to recycle and reuse for crafting - making cards, tags and Christmas trims. These Victorian children at play were 'pop outs' from a birthday card my sister sent me one year. The pink crackers are for my girls and the blue one for my younger son. I also plan to make a 'Childhood' cracker for my new baby to hold a pair of bootees!


My youngest daughter - a twin, is excited to know she has a cracker made especially for her! She insisted on pink ribbons and lace for the trimming! As did her sister! She knows that there are chocolates inside and a surprise! Are you inspired yet? Ready for some practical help? Set aside some time for a cracker making session. Let's get started!


First of all, you need to gather your materials. I use cracker making kits to make the interiors, which can be found in many craft and discount stores. A set of six costs about $3! Before these kits appeared on the market I used to make crackers using cardboard tubes, this involved lots of measuring and cutting and it was rather fiddly. The kits come with everything you need (the tube, the snap, hats, paper ribbon ties and very corny jokes) to make a cardboard cracker but the designs are not to my liking so a cover-up job is required. I find crepe paper gives the best result, especially when it comes to tying and crimping the end. Thicker papers such as scrap booking papers tend to be harder to work with and beware - if you use brown paper for a rustic style cracker - it will be impossible to pull! I know this from experience. The brown paper looked lovely trimmed with raffia and sunflowers but they sure tested our muscle strength that year!


You will also need good strong craft glue, scissors, a ruler and tape.

Step 1 is to roll up the tube - it even comes with slots and tabs - so easy! I usually use tape over the tabs to ensure they stay in place


Step 2 Cut out a piece of crepe paper allowing for overlap at the ends and a sufficient width that can be rolled around the cardboard tube. If you are using a light colour such as white you may need several layers to prevent the design on the cardboard tube showing through. Fold a neat hem along the edge and run a thin seam of glue along this edge and press into place. Allow to dry. Use the glue sparingly, it is very strong and too much may turn your paper soggy!


Step 3 Cut the ends to size allowing a small overlap which needs to be turned in and secured with a dab of glue or you may wish to use pinking shears or fancy paper scissors to trim the edge. I will be using ribbon to trim my edges.

Step 4 Tie off one end. I use narrow ribbon which I pull tightly, secure and leave in place. You can also use thin wire to achieve a very tight crimped effect but be careful not to rip the paper. Remove the wire and tie off with ribbon. Check the hole - is it small enough to prevent the contents from slipping out the end? - remember children shake crackers and try to peek inside!

Now it is time to trim the end using ribbon in whatever colour you desire. Chiffon and sheer ribbons always look pretty, metallic ribbons give a sparkly effect. If you are not embellishing the end with extra trims take time to get your bow right. If you are adding trims it doesn't matter if you struggle to tie the perfect bow!


I did not buy any ribbon for my crackers this year or last year. I am still using ribbon and lace I purchased in a bulk lot at a garage sale in 2008 - a huge box cost me $8! Much of it was unused and still on complete reels - lots of gold ribbon too! It was one of my best garage sale finds of all time!

Step 5 Trim the end. I am using silk leaves, attached in pairs using craft glue, building up layers of colours which complement - I have metallic gold, sage green and for contrast a silk ivy leaf. All my leaves were ripped off cheap 'tacky' garlands or taken from bunches of cheap and garish silk and polyester flower arrangements - the ones I would never dream of putting in a vase but the leaves are very useful, especially if you can find realistic looking ones in suitable shades.


Next, comes the finishing touches. A tiny silver poinsettia taken from a 'plastic' Christmas flower arrangement. I glued the flower into place and then added in the tiny silver holly leaves underneath. The little finishing details are glued in to place last - maybe tiny faux berries or gum nuts, maybe a star anise or a little gold star. I just love this aspect of the cracker making process. Play around with different elements in your design before you glue everything down.
I then glue into place a ribbon or lace trim for the ends. This gives a neat edge and really does finish off your cracker.


Step 6 Fill your cracker! I had lots of willing volunteers ready to help at this stage! Resist the temptation to eat the chocolates and always use wrapped chocolates or candy! Do not leave your crackers in a warm place - on a sunny windowsill or close to the fireplace if you are in a cold climate - the consequences might be soft candy or melted chocolate! There are so many tiny gifts suitable for filling your crackers. Use your imagination but suggestions are jewelery, stickers, tiny pencils or pens, key rings, lip gloss and other make up items, hankies, tiny soaps or bath pearls. For boys and men - tiny tape measures, torches or other gadgets for key rings, fishing or golf accessories.


You may wish to choose contents in a colour that coordinates with the cracker. As my daughter loves purple, I have chosen gifts for her in suitable shades. I have replaced the joke with a little card offering inspiration. Each of my children are receiving a little card with words of hope from the Bible. You may wish to write out Scriptures or other words of encouragement. And as for the awful jokes - they are all in my husband's cracker for him to read aloud at the table!


Finally, you need to repeat the tying off and trimming steps for the other end of your cracker. Make sure it matches the opposite end! Glue into place in the centre of your cracker your chosen picture or embellishment. I absolutely love these faux fronds of silver fern which I have used on my daughter's 'purple' cracker and the 'All Black' masculine crackers for my husband and eldest son - very appropriate as they are New Zealanders and All Black supporters - as I am also a NZ citizen I will be joining them in front of the TV screen on Saturday night to cheer on the All Blacks in the Rugby when they play Australia! Now here's an idea for the mad keen sports men in your life - make them a cracker in the colours of their favorite team and add the team's logo. Just love that the All Blacks wear the Silver Fern - it goes so well with my Christmas decorating! Notice how these silver fronds are appearing in my other table decorations! I'm so glad it was not a Kangaroo a Bulldog or a Shark!


I hope you have been inspired - if you do not have the time to make your crackers from scratch, why not buy a set of plain foil crackers in silver or gold and add your own ribbons and embellishments in colours to tie in with your table setting. For those who want to make crackers in a similar fashion to mine here is the cost breakdown - remember this is in Australian dollars!

1 cracker kit (makes 6 crackers) $3 - that is 50 cents per cracker for the inner tube and snap!
Crepe paper 99 cents - $1.20 per pack, 2 packs used for a set of 6 crackers
Glue - I buy a 1 litre bottle for $20 at Bunnings, of course it will be used for lots of craft projects!
Ribbon and trim, minimal cost - from my stash of garage sale lace! Each year I recycle the silk leaves and trims to reuse the following year.
Silver Ferns - a stem cost $5 at Spotlight but I have used it on two garlands, as well as the crackers.
Gifts to go inside - I usually allow $3-$5 per person for 'gift crackers'. Spare crackers are filled with a handful of chocolates. I buy a big box from Big W for $10. This year I found earrings and necklaces for $3 reduced from $8 and $15 at Big W. Also packs of stationery for $3 which were split up between crackers.

It works out at around less than $3 for each cracker plus the gift - of course you can keep the cost down by recycling trims, cards and ribbon and just filling the crackers with candy or chocolate. It is entirely up to you but by creating your own crackers you are not only giving a special handmade gift (made with love!) but designing something beautiful to decorate your table this Christmas. I look forward to showing you my Christmas table with the crackers in their individual place settings.

Wishing you a very Creative Christmas Season. More inspiration coming soon!

With love and joy,
Ann